
![Cover image for [Free Service #1] Fixing AI Designs with Agentation](/assets/images/posts/423d38a8-4d81-4677-bb1a-14c4060c902a/agentation-visual-feedback-1.jpg)
Asking AI to build a website is easy now. The real struggle starts afterward—when you show the finished screen and say, “This button looks a little odd.”
“The blue button in the center.” → AI fixes the wrong button. “No, the one above it.” → It touches something else. “The second one from the top, next to Login…” → Eventually, you open the code yourself.
The cause is simple. People look at the screen; AI looks at code. Trying to connect two different views with words leaves gaps. Agentation was built to fill them.
This series introduces services you can use for free, one at a time. We check what they do, how far the free tier goes, and what conditions apply. The first is Agentation.
Point at the screen, and translate it into language AI understands
Agentation is a small toolbar floating over the website you are building. Click something you dislike and leave a note such as “The spacing is too tight”; it formats the note so an AI coding tool can act on it directly.
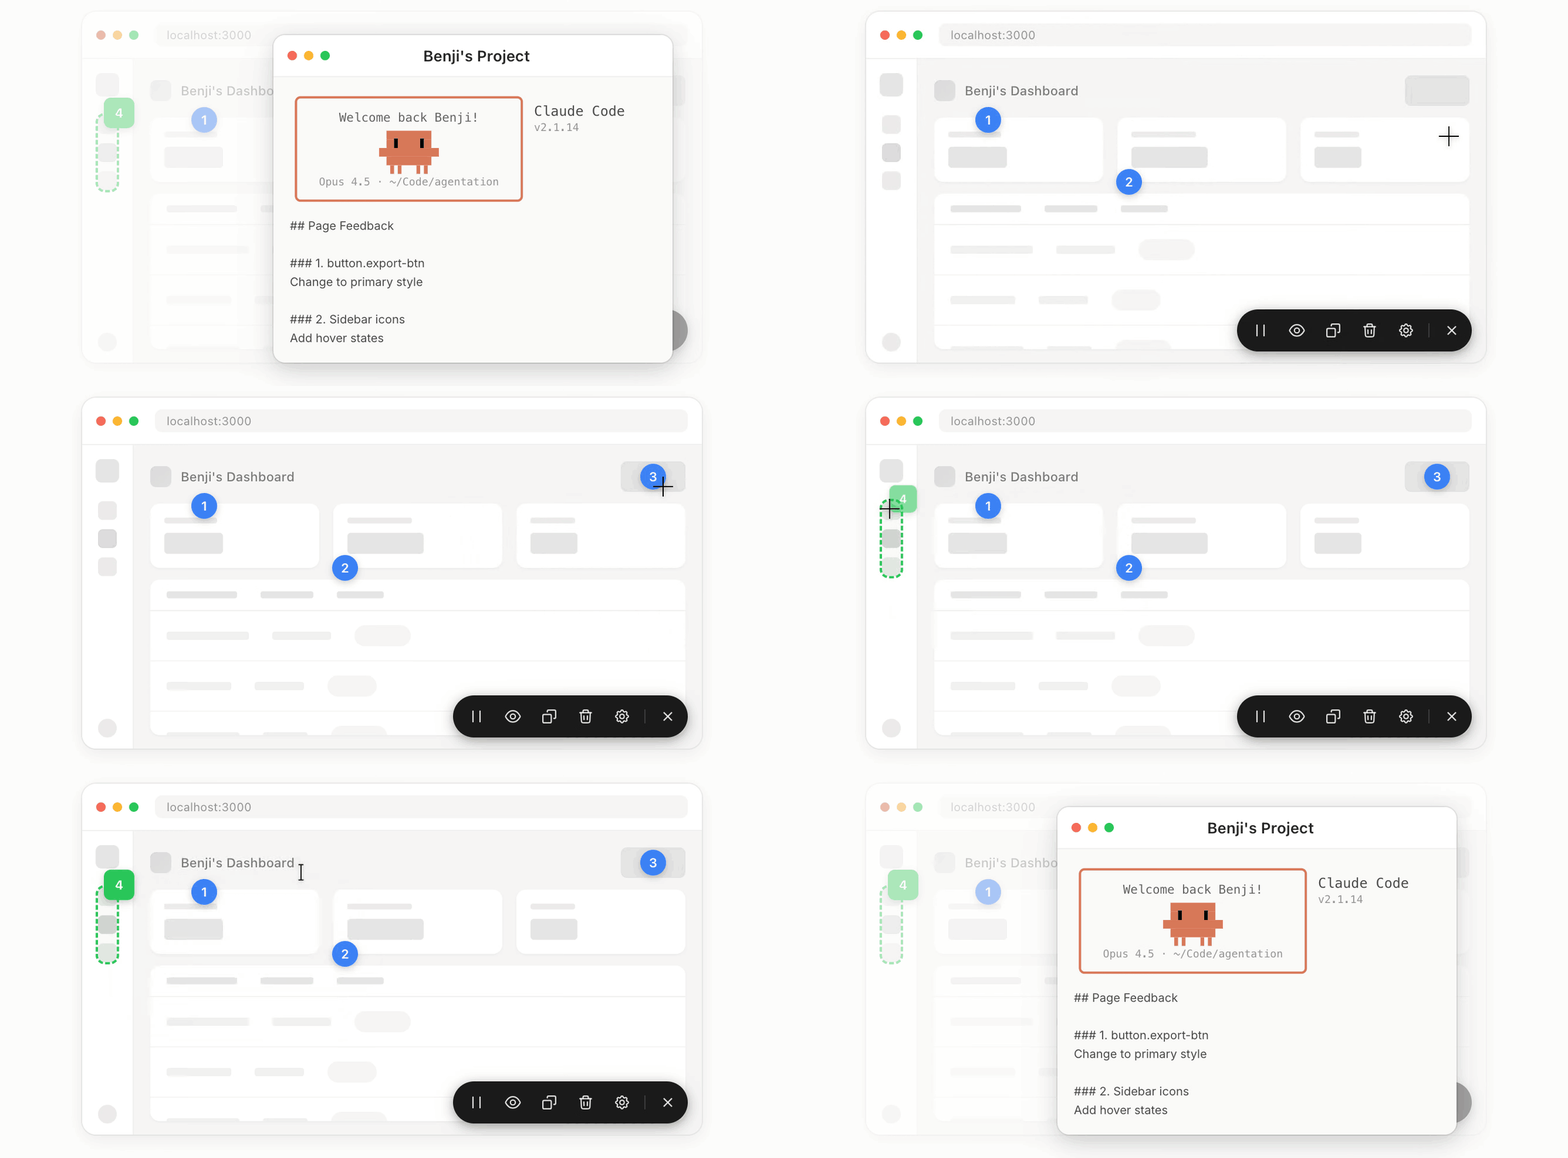
The key is that it “organizes” the feedback. One click automatically adds information like this.
- A CSS selector that finds the element in code (an address identifying a screen element in code) —
body > main > .hero-section > button.cta - The source file and line number that created the element —
src/components/Button.tsx:42 - The React component hierarchy —
App > LandingPage > HeroSection > CTAButton - Position and size, surrounding text, and the colors, fonts, and spacing currently applied
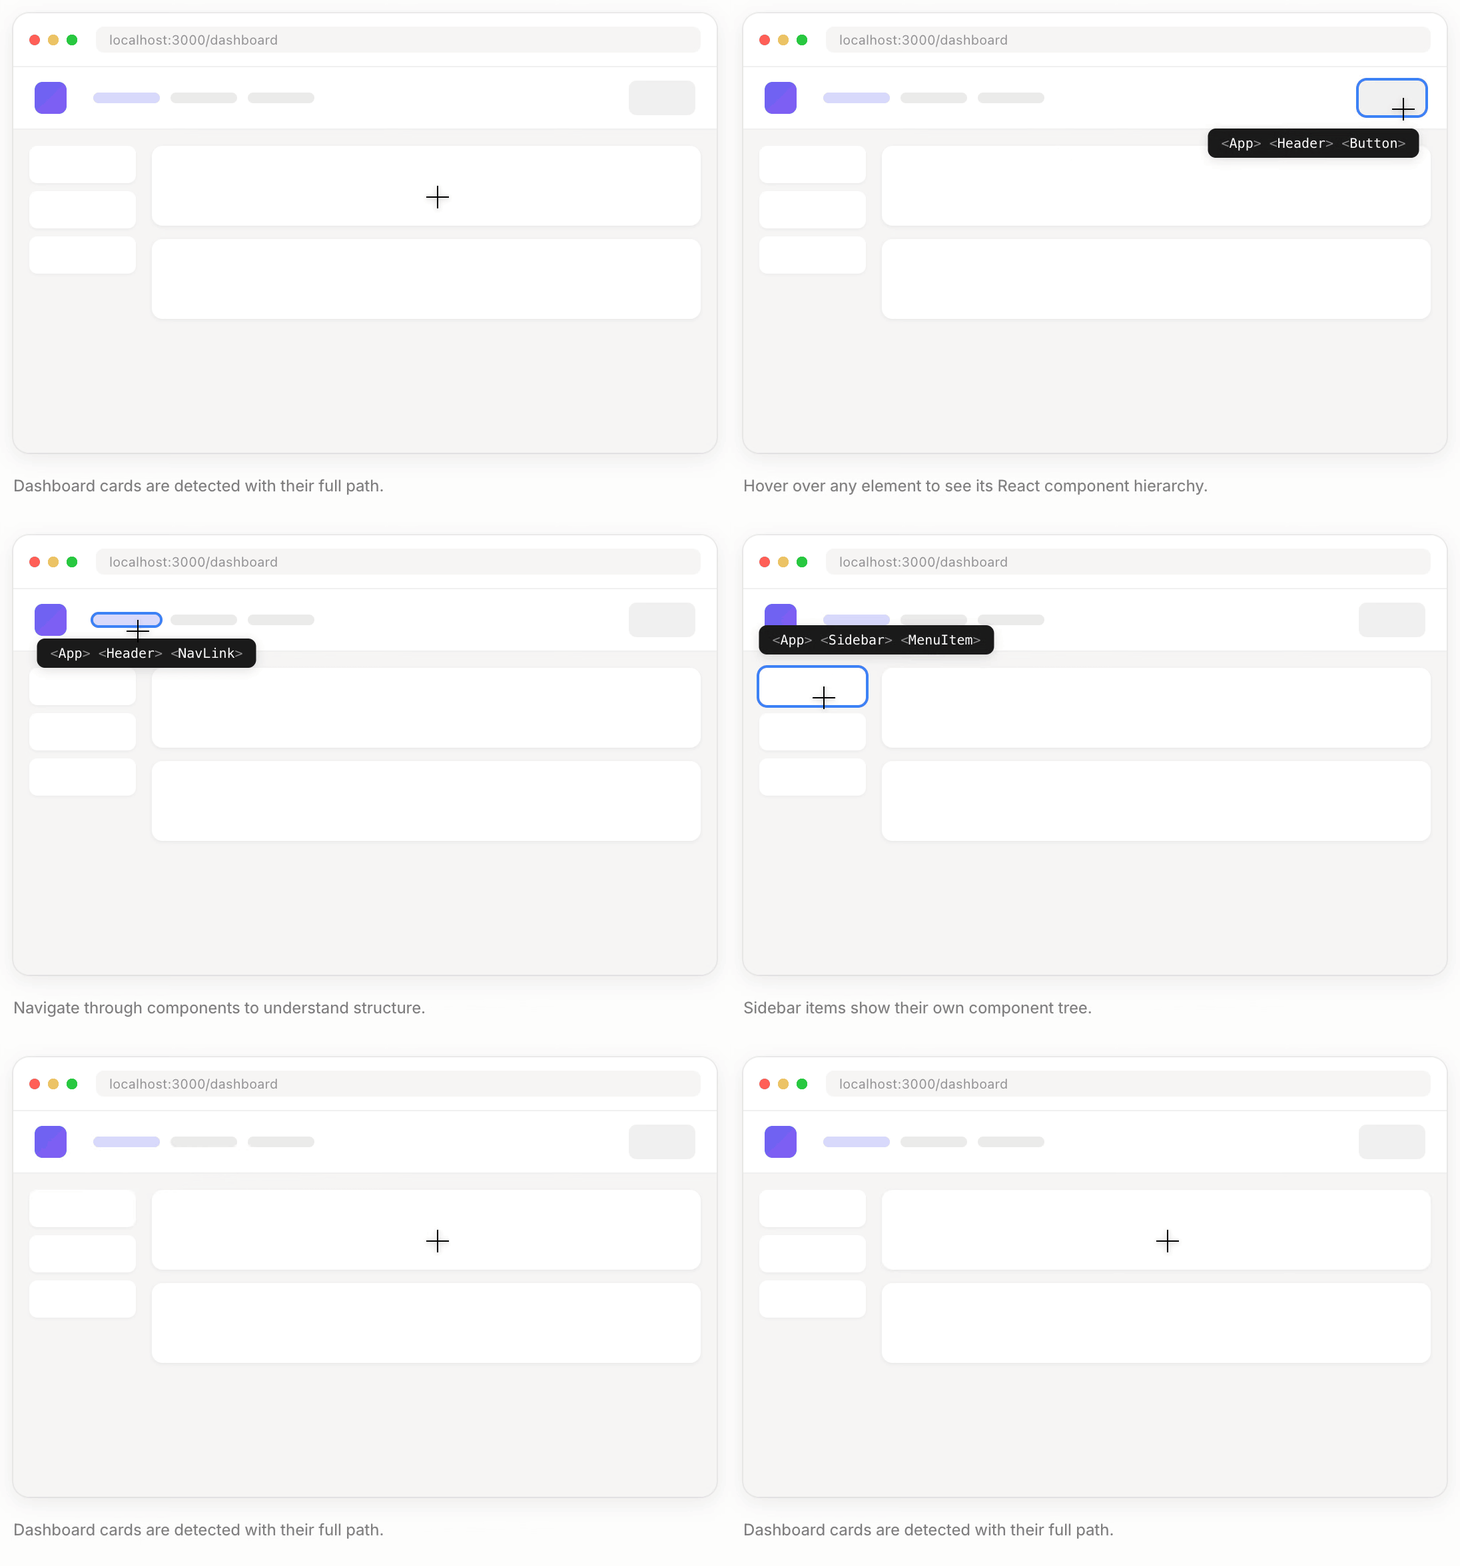
Press Copy, and information in this format goes to the clipboard.
## Page Feedback: /landing
**Viewport:** 1440×900

### 1. button
**Location:** body > main > .hero-section > button.cta
**Source:** src/components/Button.tsx:42
**React:** App > LandingPage > HeroSection > CTAButton
**Feedback:** Button is cut off on mobile viewport
You can adjust the amount of information. There are four levels—Compact, Standard, Detailed, and Forensic—and the example above uses the default, Standard. When you need to determine why spacing or colors look that way, switch to Forensic to include computed CSS values.
The Source: line—that is, the source file and line number—is added only in development mode. Vite, Next.js, webpack, and Turbopack are supported, though bundler settings may omit this information. Without it, you can still navigate using the selector and component hierarchy; accuracy is just slightly lower.
Paste this into Claude Code or the Cursor chat and you are done. AI no longer has to guess which “blue button” you mean. It has an address and goes straight to that file and line.
Why not just draw an arrow on a screenshot?
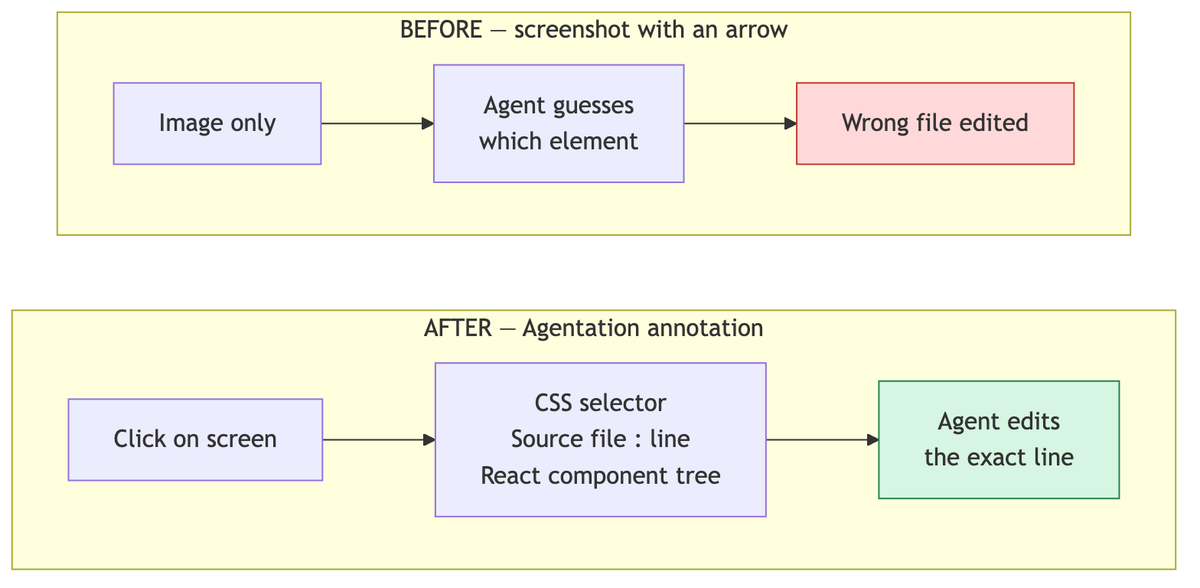
It is common and not useless. But a screenshot is only an image, so it is not connected to code. AI must start by finding where the button in the image exists in the code, and may fix a similar-looking button instead.
Agentation passes a searchable string, not an image. With a selector and class name, AI can search the codebase and pinpoint the exact location. That is the decisive difference from an image with a drawn arrow.
There are five ways to point things out
The target is not always a single button, so there are several methods.
- Element click — Pinpoint one button, card, or image.
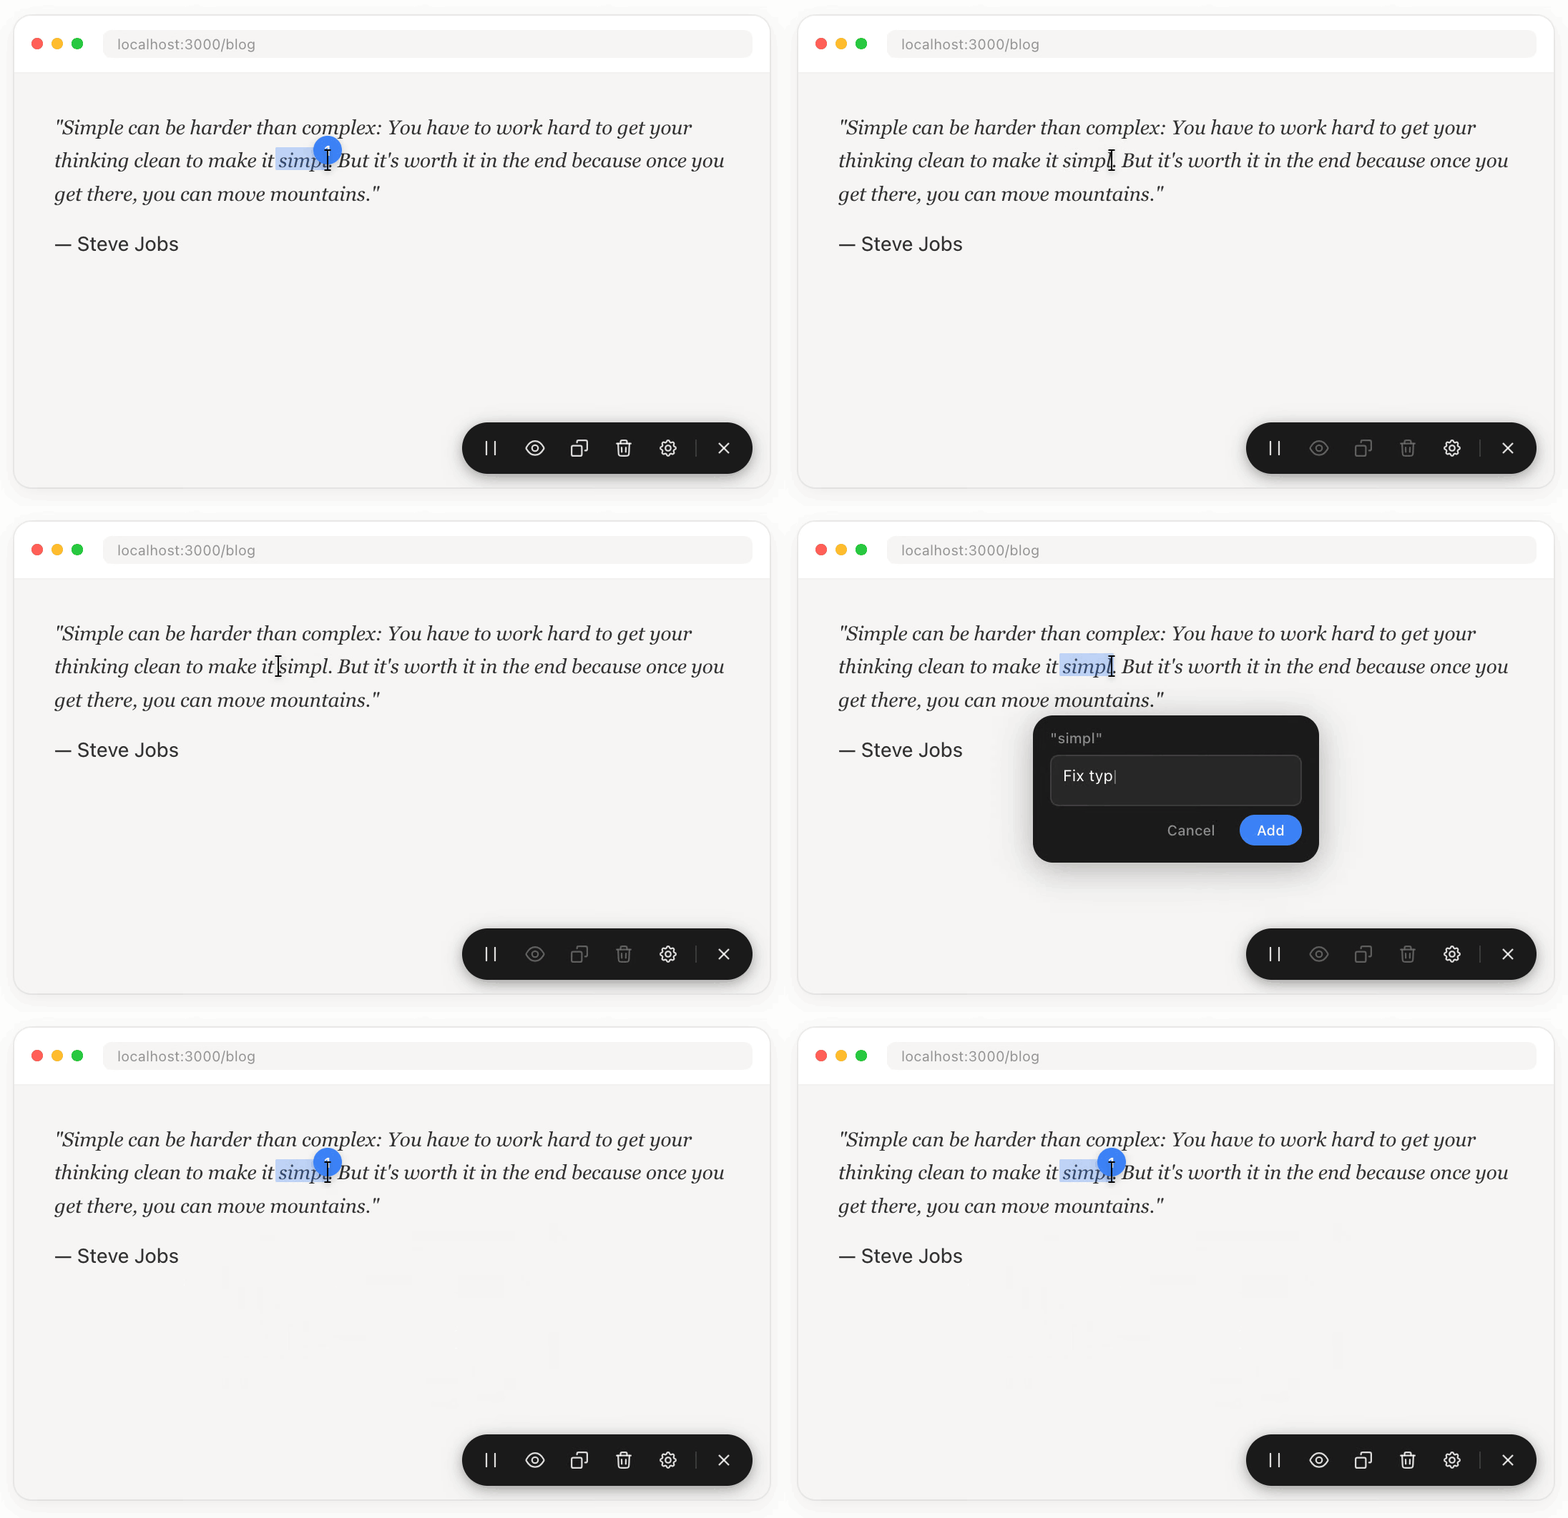
- Text selection — Use it to fix a typo or wording. The selected sentence is included in quotation marks, letting AI search for it directly in the code.
- Multi-select — Drag across several elements at once. It suits requests such as “Align the spacing of these three cards.”
- Area selection — Empty space can be selected too, making “This area feels empty” possible.
- Pause animation — Press the
Pkey to pause CSS, JavaScript, and video animations. Stop a moment that slips by too quickly to catch and comment on it. Some third-party animation libraries may not pause completely.
A few shortcuts are useful to remember. Cmd+Shift+F (Ctrl+Shift+F on Windows) toggles feedback mode, C copies, X deletes everything, and H hides markers.
Layout mode for changing the arrangement
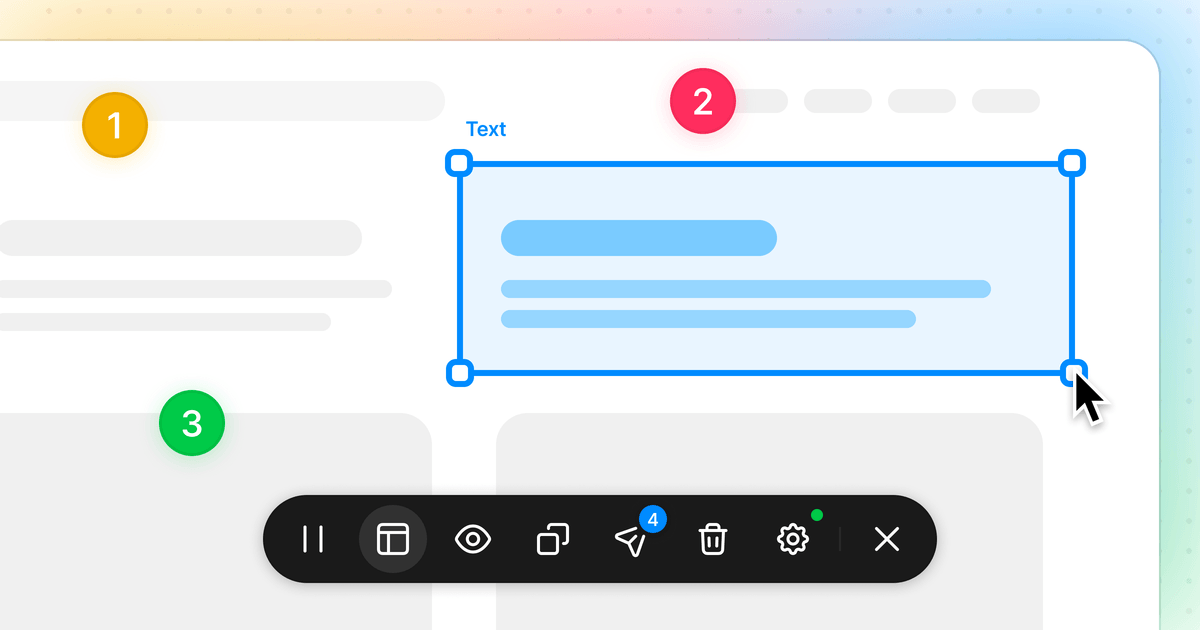
Requests like “Move this card right and add a form below it” become vague when put into words. Press L to switch the toolbar to layout mode. Instead of describing the arrangement, you show it by moving things directly.
- Drag more than 65 elements from the component palette onto the screen.
- Hover over an existing section to see its CSS selector label, then drag it to change the order.
- Turn on “New page wireframe” to fade the current design and sketch on a blank screen. You can also draw while viewing the original screen through the opacity slider.
- There is also a separate field for noting what the page is for.
Each change made this way is passed along with one of feedback, placement, or rearrange attached to every annotation. AI receives coordinates and dimensions, not a sentence like “Move it to the center.” Layout mode arrived in Agentation 3.0, requires checking the version, and like the other features works only on desktop. Details are in Official blog post.
Installation without calling a developer
If you use Claude Code, one line in the terminal is enough.
npx skills add benjitaylor/agentationThen type /agentation in Claude Code; it detects the framework and completes the installation. You can get this far without reading code.
To do it manually, install the package and add one component line.
npm install agentation -Dimport { Agentation } from 'agentation';
function App() {
return (
<>
<YourApp />
{process.env.NODE_ENV === 'development' && <Agentation />}
</>
);
}The NODE_ENV === 'development' condition afterward means “show the toolbar only during development.” Do not omit it: it keeps the toolbar hidden from visitors using the production service.
Framework-specific installation steps and configuration options are documented in the Install and Features sections of Official website.
Connect with MCP if even copy-paste feels tedious
Leave a note, copy it, paste it into chat. Repeating that becomes work. Connecting through MCP (Model Context Protocol, a standard for AI tools to exchange data with external programs) removes the round trip. AI fetches notes automatically. Separately from the toolbar, you must attach the agentation-mcp server and enable synchronization in settings.
From here, there are three ways to use it.
- Hands-free — When a new note appears, AI checks it, fixes it, and marks it resolved. You keep pointing things out while watching the screen.
- Critique — Conversely, AI opens the browser, scans the page, and leaves design issues as notes. You review them.
- Self-driving — AI identifies the issues and makes the fixes.
The latter two require AI to open the browser directly, so you must install the agent-browser skill separately. If you are new to this, Hands-free is the easiest starting point.
It also matters that connected notes are no longer one-way. If AI asks in the note, “Should this be 24px or 16px?”, you answer in the same place. States such as pending, in review, resolved, and deferred remain visible. It becomes a conversation, not a handoff.
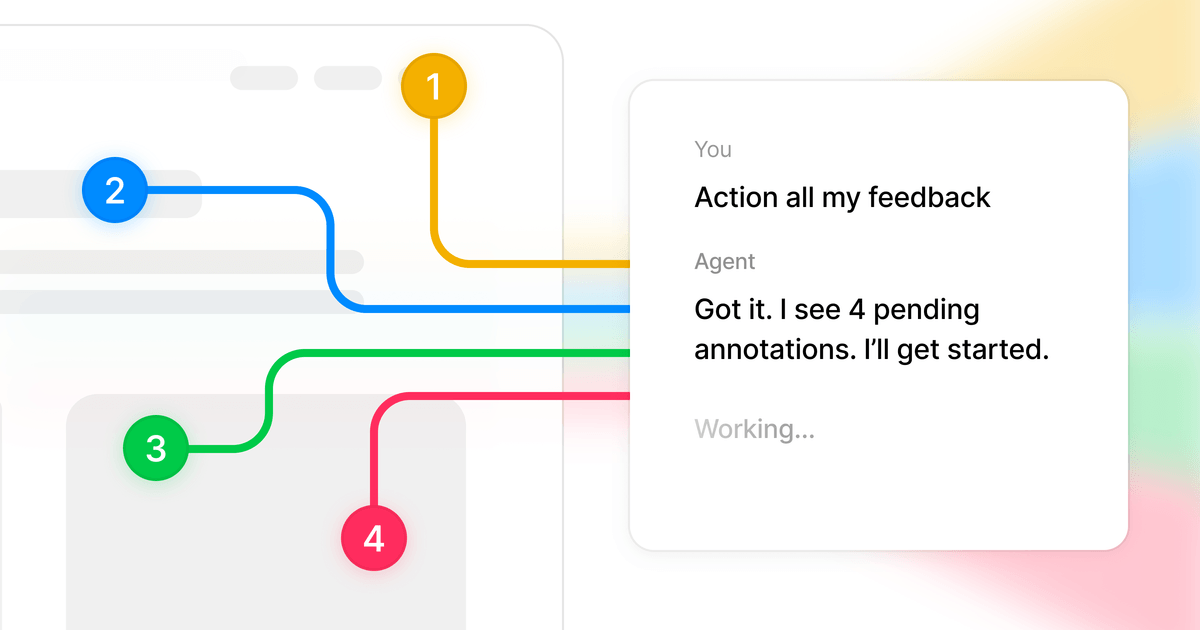
As an aside, the data structure for these exchanged notes is publicly available as AFS (Annotation Format Schema). The creators describe it as “smart Figma comments attached to a running app.”
Conditions to know before starting
The good news needs some clear boundaries.
You cannot edit someone else’s website. Install it in a project you are building and use it while its development server runs on your computer. It is not an extension for opening any site and changing its design.
React 18 or later is required. If you ask AI to build a web app, it will probably use React, but verify it. It also works with SSR/SSG frameworks such as Next.js, Remix, and Astro. Astro is not React-based, but it works when configured with React.
Desktop only. Because the tool relies on hovering and dragging to select targets, it is effectively unusable on mobile. To inspect a mobile issue, work around it by narrowing a desktop browser window.
There are no images in the output. Everything is text. For feedback about color or mood that is hard to express in words, screenshots are still better.
Elements inside iframes cannot be targeted. This includes embedded payment widgets and maps—areas containing an entire external site. Browser security policy makes this unavoidable.
Notes do not last long. Without an MCP connection, they are saved in the browser per page and disappear after 7 days. If you plan to accumulate them for later, connect MCP.
The price is not a concern. Internal use is free for individuals and companies. A separate license is required only for redistribution or commercial provision. It follows PolyForm Shield 1.0.0.
Summary
- Agentation is a toolbar that translates a clicked screen location into a code address AI can understand.
- Selectors and the component hierarchy are added automatically; in development mode, the source file and line number are included too, so AI does not have to guess which button you mean.
- You can give feedback in five ways: click, text selection, multi-select, area selection, and pause animation.
- In layout mode, opened with the
Lkey, you can drag and drop components, reorder sections, and show the arrangement itself (3.0 or later). - With Claude Code, installation is complete with
npx skills add benjitaylor/agentationfollowed by/agentationonce. - With MCP, AI fetches notes directly without copy-paste and can ask questions and receive answers in conversation.
- However, it works only in a desktop browser while your React 18+ project is running on a development server.
If you keep getting tired of explaining the same things, try pointing at them with your finger instead. The official website is https://www.agentation.com/. In the next installment, we will explore another free service.