
![Cover image for [Swift Intermediate #7] How Property Wrappers Work: Why @State Isn't Magic](/assets/images/posts/33440ae0-f781-4765-a6c7-694f65980263/swift-property-wrapper-1.jpg)
Developers who use SwiftUI type @State and @Published dozens of times a day. But ask what the at sign actually does, and answers vary. “Isn’t that SwiftUI syntax?” is a common misconception. It isn’t. A property wrapper is a Swift language feature introduced in Swift 5.1 through the Swift Evolution proposal SE-0258; SwiftUI is simply its most famous client.
This is part 7 of the intermediate series. We’ll understand property wrappers by implementing their behavior ourselves, then clarify wrappedValue, projectedValue ($), and how to decide when not to overuse them.
The problem — Repeated wrapping logic for every property
In the properties article, we saw a pattern that validates values with didSet. But what happens when several properties need the same validation? If volume, brightness, and progress must all be clamped to 0…1, you end up copying three didSet blocks.
var volume: Double = 0.5 {
    didSet { volume = min(max(volume, 0), 1) }
}
var brightness: Double = 0.5 {
    didSet { brightness = min(max(brightness, 0), 1) }
}
// The same code keeps appearing...
Writing the same logic again for each property is the property-level version of the “duplication or safety” problem from the generics article. A property wrapper gives this wrapping logic a name and makes it reusable.
@propertyWrapper
struct Clamped {
    private var value: Double = 0
    var wrappedValue: Double {
        get { value }
        set { value = min(max(newValue, 0), 1) }
    }
}

struct Player {
    @Clamped var volume: Double
    @Clamped var brightness: Double
}
Even if you assign player.volume = 1.5, 1.0 is actually stored. The validation logic exists only once, in Clamped.
How it works — What the at sign translates to
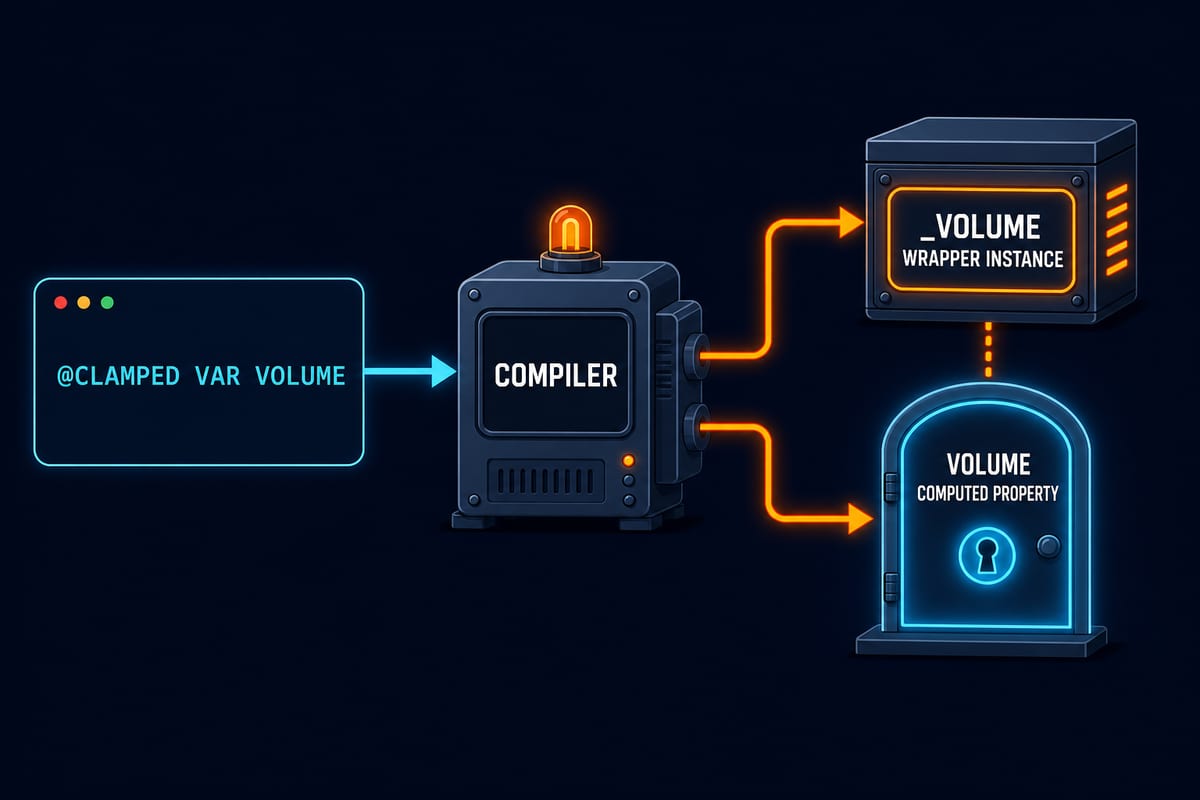
To verify that @Clamped isn’t magic, look at the compiler’s translation. @Clamped var volume: Double expands roughly as follows.
private var _volume = Clamped()          // Actual storage: wrapper instance
var volume: Double {                     // The name we use: computed property
    get { _volume.wrappedValue }
    set { _volume.wrappedValue = newValue }
}
There are two key lines. What is actually stored is the underscored wrapper instance, while the name we access is a computed property that forwards to the wrapper’s wrappedValue. The distinction between stored and computed properties from the properties article is being used directly here. A wrapper packages “stored property + computed property + repeated logic” into one type and exposes it through at-sign syntax.
Once you know this translation, the wrapper’s restrictions make sense. The confusing behavior when adding didSet to a wrapped property that is actually computed, and the former restriction against local variables or computed properties (locals have been allowed since Swift 5.5), all come down to where the underscored storage is created.
projectedValue — What the dollar sign really is
In SwiftUI, you’ve probably seen a dollar sign added, like $text. This is also a wrapper feature. When you declare a property named projectedValue in the wrapper type, the compiler provides a third access path called $이름.
volume→ wrappedValue (the value itself)_volume→ the wrapper instance (accessible only inside the declaring type)$volume→ projectedValue (something additionally exposed by the wrapper)
What is “something additionally exposed” is up to the wrapper designer. SwiftUI’s @State exposes a Binding—a read-write channel—through $, while Combine’s @Published exposes a Publisher, a stream of changes. The same $ syntax produces different objects because this is a design decision made by each wrapper, not a language rule. The same applies when you build one yourself. If you add a projectedValue to Clamped that reports whether the value was clamped, $volume becomes an API for checking whether the most recent assignment was out of range.
Practical recipe — Learning design through a UserDefaults wrapper
One of the most widely used custom wrapper patterns in production is accessing UserDefaults. Let’s build one while confirming the underlying principles.
@propertyWrapper
struct UserDefault<T> {
    let key: String
    let defaultValue: T

    var wrappedValue: T {
        get { UserDefaults.standard.object(forKey: key) as? T ?? defaultValue }
        set { UserDefaults.standard.set(newValue, forKey: key) }
    }
}

enum Settings {
    @UserDefault(key: "hasSeenOnboarding", defaultValue: false)
    static var hasSeenOnboarding: Bool
}
Repeated logic for mistyped keys, casting, and default-value handling moves into the wrapper, leaving the call site as a single line: Settings.hasSeenOnboarding = true. The example also demonstrates that the generic <T> and the init parameters (key, defaultValue) apply to the wrapper unchanged. The parentheses after the at sign invoke the wrapper’s init.
These are the wrapper’s natural home: changing storage (UserDefaults, Keychain), wrapping access (thread locks, logging), and refining values (range limiting, trimming). The common thread is that they are technical concerns of storage and access, independent of the value’s meaning. From a separation-of-concerns perspective, a wrapper separates technical concerns from the property declaration.
Where to draw the line — Complexity hidden behind the at sign
A wrapper’s risk comes directly from its strength: arbitrary code can hide behind a single assignment. This feature is in direct tension with the principle of least surprise.
Here are three guidelines. First, wrappers should do only predictable things. Refining values or changing storage is fine, but hiding heavy side effects such as network requests or screen transitions behind an assignment creates a debugging nightmare. Second, use only wrappers the team knows. Ecosystem standards like @State or wrappers documented in the codebase are assets, but when a new at sign appears in every file, code review becomes a game of hunting down wrapper definitions. Third, leave one-off logic in didSet. Wrappers exist for reuse, so promote logic only when a second use case appears—the YAGNI (You Aren’t Gonna Need It — don’t build it until you need it) principle in practice.
One final recent development: as Swift and SwiftUI move toward macro-based features, at signs that are macros rather than wrappers have appeared, such as @Observable in the Observation framework. An at sign no longer necessarily means a property wrapper. We’ll cover what macros are and how they differ from wrappers in an advanced series.

Summary
- Property wrappers are not exclusive to SwiftUI. They are a Swift 5.1 language feature (SE-0258) that packages recurring wrapping logic for each property into a reusable type.
- The principle is translation. @Wrapper var x expands into “an underscore-prefixed wrapper instance (storage) + a computed property named x (access path).”
- $x is a third access path called projectedValue, and what it exposes is determined by the wrapper designer (@State exposes Binding, while @Published exposes Publisher).
- They are best suited to technical concerns such as changing storage locations, wrapping access, and refining values; heavy side effects and one-off logic do not belong in wrappers.
The next installment is KeyPath, the final part of the intermediate series. It explains how the backslash syntax \.name treats properties as values and why map(.name) became possible.