
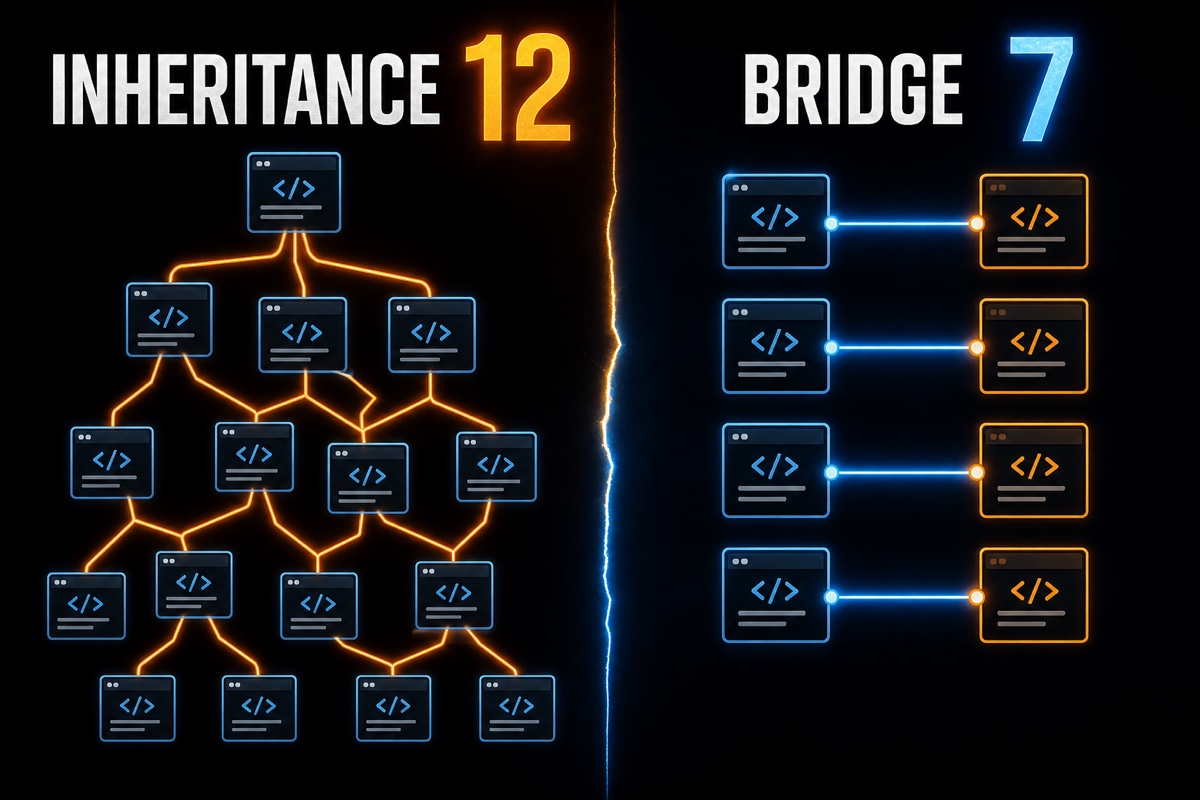
When building an app with Swift, you eventually reach a point where classes keep multiplying.
You only added one button, but now you need light-mode, dark-mode, iOS, and iPadOS variants—the combinations make the class count explode.
Let’s get to the point. The Swift Bridge Pattern separates “what it does (abstraction)” from “how it does it (implementation)” into separate class hierarchies, so the two axes are managed additively rather than multiplicatively.
This article walks through why subclass explosion happens, how the Bridge Pattern prevents it, and the corresponding Swift code.
Why does subclass explosion happen?
Subclass explosion occurs when two independent axes of change are represented using inheritance alone.
Let’s look at an example.
Suppose there is a Remote class that controls TVs and radios.
What if you also need two kinds of remote: a “basic remote” and an “advanced remote”?
The combinations look like this.
- Basic remote × TV
- Basic remote × radio
- Advanced remote × TV
- Advanced remote × radio
That is already four classes.
Add a speaker as a device and it becomes six; add a voice remote and it grows to nine.
With two axes, inheritance alone makes the class count grow by multiplication (m×n), not addition (m+n).
That is subclass explosion. As the axes increase, the maintenance burden grows exponentially.
How does the Swift Bridge Pattern prevent this?
There is only one core idea.
Separate the two changing axes into independent hierarchies and connect them through a reference (composition).
- Abstraction layer: remote types (basic/advanced)
- Implementation layer: device types (TV/radio)
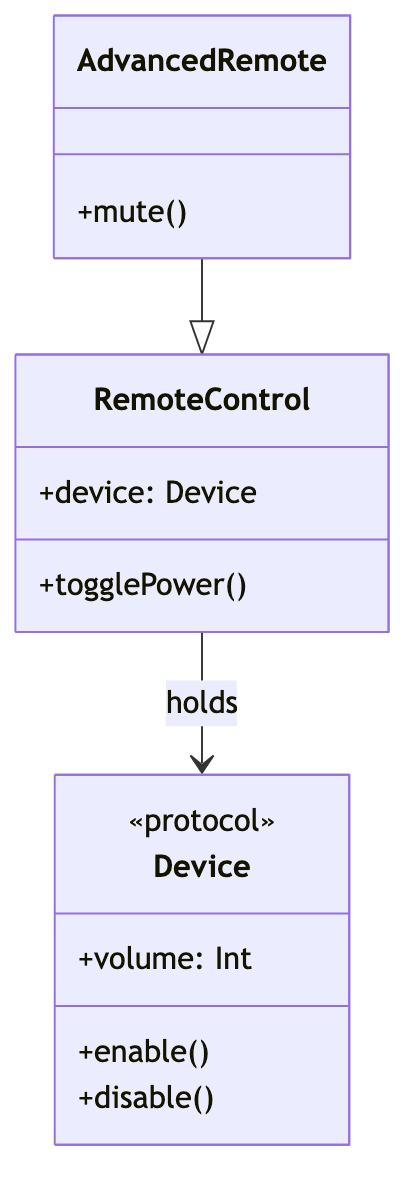
The remote does not inherit from the device. Instead, it holds the device interface as a property.
First, define the implementation layer as a protocol. It contains only the minimum operations a device must provide.
// Implementation layer: minimum capabilities a device must provide
protocol Device {
    var volume: Int { get set }
    func enable()
    func disable()
}
The remote, as the abstraction layer, only references Device. This is injection, not inheritance.
// Abstraction layer: owns the device and delegates to it
class RemoteControl {
    let device: Device          // Bridge connection point
    init(device: Device) { self.device = device }
    func togglePower() { /* device.enable/disable Call */ }
}
This device property is the bridge connecting the two layers.
How does it change when we actually extend it?
Here is what I noticed while expanding the code myself.
To add an advanced remote, subclass RemoteControl and add just one class to the remote hierarchy.
// Abstraction extension: not a single line of device code changes
class AdvancedRemote: RemoteControl {
    func mute() {
        var d = device
        d.volume = 0        // Delegate to the implementation layer
    }
}
Conversely, to add a new device, such as a speaker, just conform to the Device protocol. The remote code is reused unchanged.
The two axes are completely independent, so expanding one does not require creating new combinations on the other.
The difference is clear in a table.
| Category | Inheritance only | Bridge Pattern |
|---|---|---|
| Class growth | Multiplication (m×n) | Addition (m+n) |
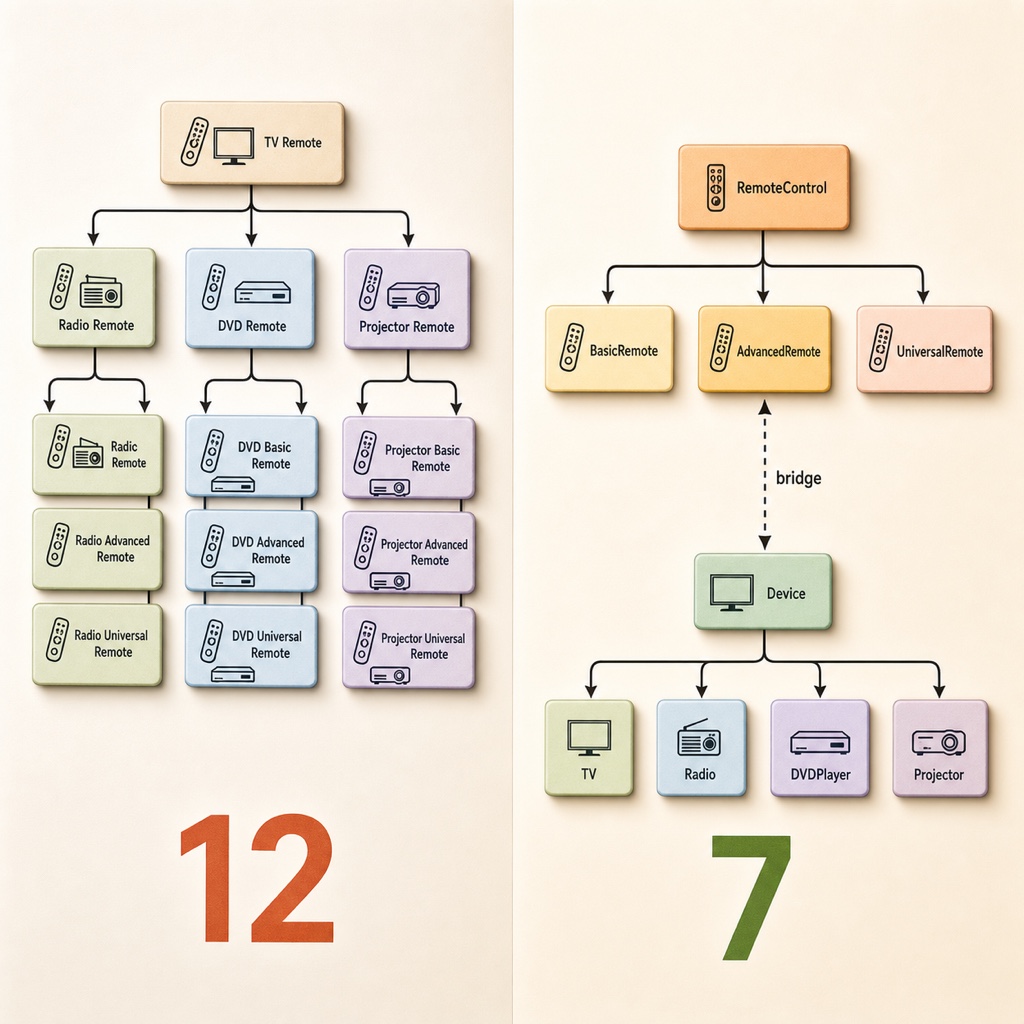
| 3 remote types × 4 device types | 12 | 7 |
| When adding a device | Add as many as there are remote types | Add only 1 |
| Runtime replacement | Difficult | Flexible through injection |
With 3 remote types and 4 device types, 12 classes become 7. The larger the axes, the greater the gap.
When should you use it, and when should you avoid it?
The Bridge Pattern is not the answer for every situation. Overusing it can make the code more complex.
It is a good fit when:
- You can see two or more axes that change independently
- You want to swap implementations at runtime (for example, a real API ↔ mock)
- You want to cleanly separate platform-specific and theme-specific implementations
You can skip it when:
- There is only one axis, or the combinations will remain fixed at two or three
- The structure is simple, but splitting it into hierarchies in advance would be overengineering
Because protocols and dependency injection are so natural in Swift, you may realize that you have already been using the Bridge Pattern without knowing its name.
Frequently asked questions (Q&A)
Q. How is it different from the Adapter Pattern?
An adapter connects already-built, incompatible code afterward. A bridge is designed from the start to separate two axes during system design.
Q. Do I have to use a protocol?
Yes. In Swift, defining the implementation layer as a protocol is the most natural approach. Unlike an abstract class, a protocol also lets value types (structs) serve as implementations.
Q. Can I use it with SwiftUI?
Yes. If a view receives a data-source protocol through injection and only handles rendering, that is already a Bridge structure.

If growing subclasses have been stressing you out, remember just one thing today.
When you think, “This class changes for two reasons,” that is the time to split the two axes.
Move a small example over by hand first; it becomes familiar faster than you might expect. I hope your code feels lighter!