
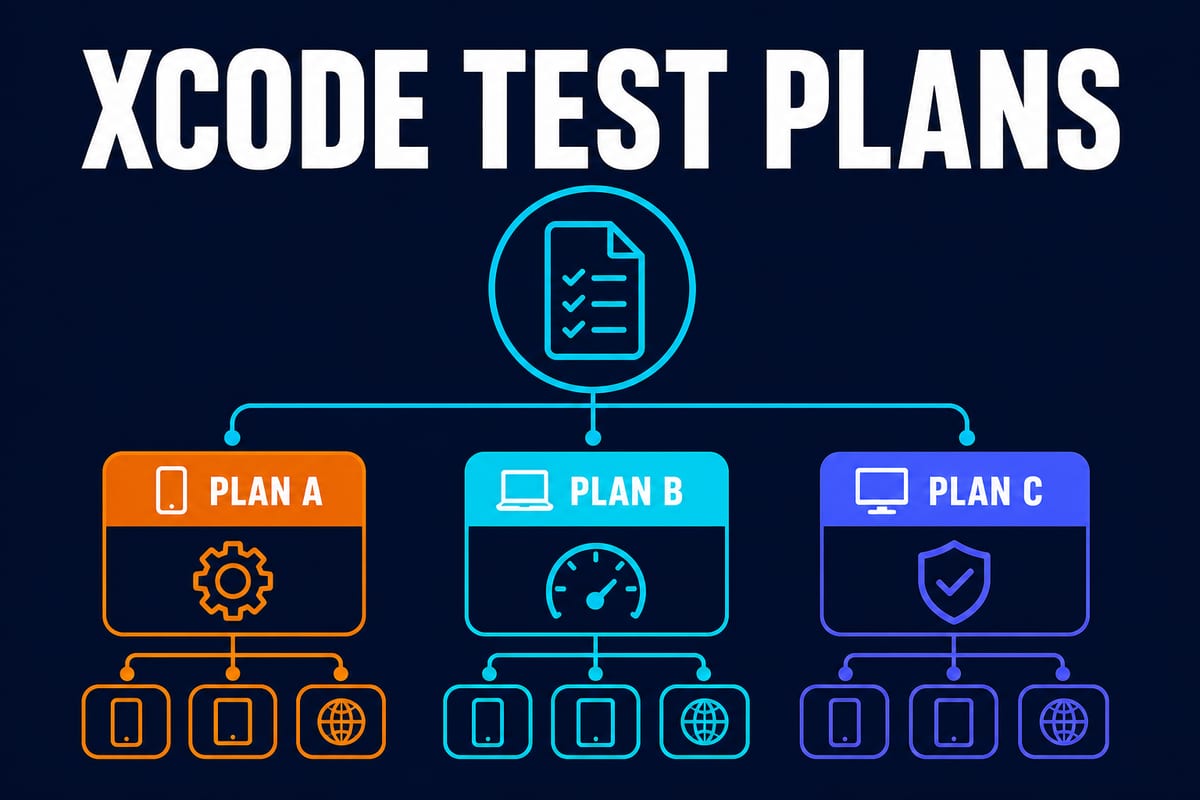
Once you have accumulated a reasonable amount of test code, a new question arises: “What combination should I use to run these tests?”
Running everything takes 20 minutes in CI (Continuous Integration). Running only part of it means manually toggling checks every time.
You may also want to run UI tests in both Korean and English environments without having an obvious way to do so.
The answer is Test Plans, which Apple created specifically to solve this problem.
Test Plans introduced in Xcode 11 separates “which tests to run” from “the conditions under which to run them” and manages both in a file.
This guide covers Test Plan structure, practical configuration, and CI integration in one place.
If writing test code still feels unfamiliar, start with How to write your first test with XCTest fundamentals and Given-When-Then.
What is a Test Plan?
A Test Plan is a file with the .xctestplan extension. Its contents are human-readable JSON; add it to the project and reference it from a Scheme.
A single file contains two things.
- Tests to Run: which test targets, suites, and functions to include or exclude. In Xcode 16 and later, Swift Testing tags can also be used as conditions
- Configuration: the conditions under which to run those tests
The important point is that this is a file. You can commit .xctestplan to Git, share the same conditions with teammates, and make configuration changes subject to code review.
For team use, it is safer to version the plan together with the shared Scheme that references it.
Why aren’t scheme settings enough?
Before Test Plans existed, all execution conditions lived in the Scheme’s Test action. This had structural limitations.
A Scheme has only one Test action configuration. To separate “quick validation” from “full overnight validation,” you had to duplicate the Scheme itself.
Duplicating a Scheme also brings along build, run, and profiling settings. You end up copying everything just to change one test condition.
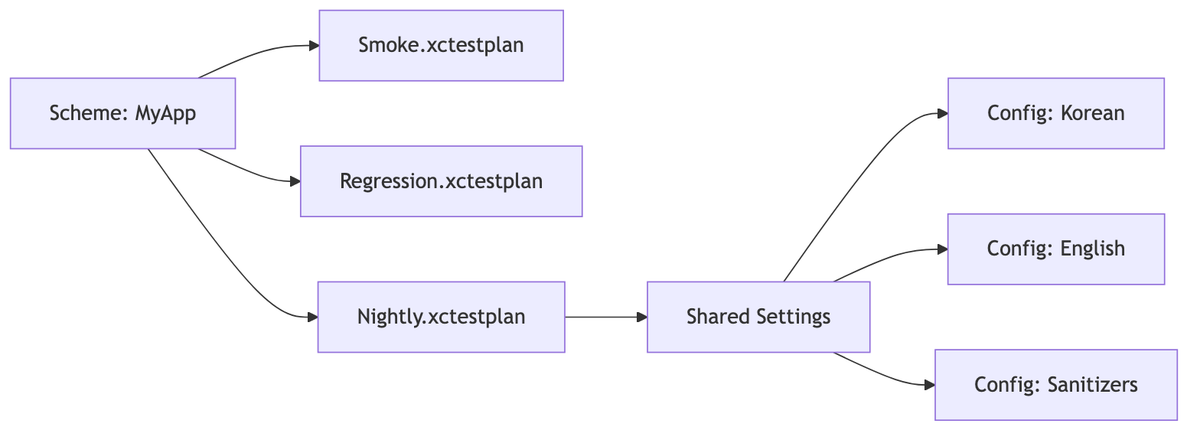
Test Plans reverse this relationship. A single Scheme can have multiple Test Plans attached, and each plan can contain multiple configurations.
Creating a Test Plan
Based on Apple’s current guide, Xcode creates a default plan containing all tests in the test targets built by the Scheme.
- Open the default plan with Product > Scheme > Edit Test Plan and save it
- In the Tests tab, choose targets, tags, suites, and functions as execution units
- In the Configurations tab, add shared settings and the configurations you need
To create another plan, use Product > Test Plan > New Test Plan. In older Schemes that do not yet use Test Plans, the scheme editor may show Convert to use Test Plans. This is Existing-settings conversion flow introduced in Xcode 11.
If multiple plans are attached, choose one as the Default under Product > Test Plan > Manage Test Plans. This is the plan used when none is specified separately.
Activate the plan to run under Product > Test Plan. Then run Command + U, or Product > Test, and the active plan runs once per configuration. Keep the default plan distinct from the currently active plan.
Relationship between shared settings and configurations
The Test Plan editor has Tests and Configurations tabs. The Configurations tab is the key one.
This tab has two layers, top and bottom.
- Shared Settings: defaults inherited by every configuration
- Individual configuration: a variant that overrides only the required shared settings
Think of it like CSS inheritance. Define common conditions once, then specify only the differing items for each configuration.
Overridden items appear in bold in the editor, making “only this is different” immediately visible.
There are many configurable items; the most commonly used ones are these.
| Item | What it determines |
|---|---|
| Arguments / Environment Variables | Launch arguments and environment variables |
| Application Language / Region | The language and region in which the app runs |
| Code Coverage | Whether to collect coverage and which targets to cover |
| Execution Order | Whether to run alphabetically or shuffle tests randomly for each run |
| Test Repetition Mode | How to repeat tests |
| Test Timeouts | Maximum execution time allowed for one test |
| Runtime Sanitization | Address·Thread·Undefined Behavior Sanitizer |
| Memory Management | Malloc Scribble, Malloc Guard Edges, Zombie Objects |
| Automatic Screen Capture | Whether to attach a screenshot automatically on failure |
Put common settings in Shared Settings and differences in configurations. Following this principle keeps management stable as plans multiply.
A practical example of splitting configurations
Language-specific configurations are the most common. In multilingual apps, layouts often break by language; splitting configurations lets you automatically repeat the same UI test code for each language.
- Shared settings: enable coverage and save screenshots on failure
- Configuration A “Korean”: set Application Language to Korean
- Configuration B “English”: set Application Language to English
- Configuration C “RTL Pseudolanguage”: for validating right-to-left languages
Run this plan once and Selected tests run once in each configuration; the result report is also separated by configuration. It immediately shows which language failed.
Memory checks are similar. According to Apple documentation, Address Sanitizer can use 2–3 times more memory and make code 2–5 times slower, so execution cost must be considered.
Instead, disable sanitizers in the normal configuration and create separate diagnostic configurations. For example, separate Address Sanitizer and Thread Sanitizer configurations by purpose and run them in overnight builds.
Coverage, random order, and repetition
Here are three particularly useful options within a configuration.
Code Coverage is not simply a matter of turning it on; first decide what to measure. Mixing dependency libraries into one number can make app-code changes difficult to interpret.
Select “some targets” and specify only your app targets to get a meaningful figure.
In Execution Order, you can choose Alphabetical or Random. Do not generalize that Alphabetical is the default for every test.
Choosing Random in an XCTest plan shuffles the order on every run. In contrast, Swift Testing runs test functions in parallel by default and randomizes their order. The two frameworks must be considered separately.
If changing the order breaks a test, it likely depended on state left by an earlier test. That is a useful signal for exposing hidden coupling between tests. This independence is also central to The FIRST principles of good unit tests.
Test Repetition is Option added in Xcode 13, and you can choose a repetition mode as follows.
| Mode | Behavior | Use case |
|---|---|---|
| Up Until Maximum Repetitions | Repeat regardless of results up to the specified maximum count | Measure the reproducibility of intermittent failures |
Repeat until failure (-run-tests-until-failure) |
Repeat until a failure occurs | Track tests that fail occasionally |
| Retry on Failure | Retry up to the specified count after failure | Protect the CI pass rate of unstable UI tests |
According to Xcode 13 Release Notes, Maximum Test Repetitions must be a positive integer. The official documentation does not confirm a “default of 3,” so inspect the value saved in the plan directly.
On the command line, set the count with -test-iterations. You can combine it with -run-tests-until-failure or -retry-tests-on-failure. This command-line repetition setting takes precedence over the plan’s repetition setting.
Retry on Failure is convenient, but use it carefully. Passing through retries leaves unstable tests in place.
Enable it as a temporary workaround, but investigate the cause of the instability separately.
Using Test Plans in CI
Test Plans can also be used directly from the command line. First use xcodebuild -scheme MyApp -showTestPlans to inspect plans linked to the Scheme. Pass a plan name, not a file path, to -testPlan.
xcodebuild test \
  -project MyApp.xcodeproj \
  -scheme MyApp \
  -testPlan Smoke \
  -destination 'platform=iOS Simulator,name=iPhone 16'
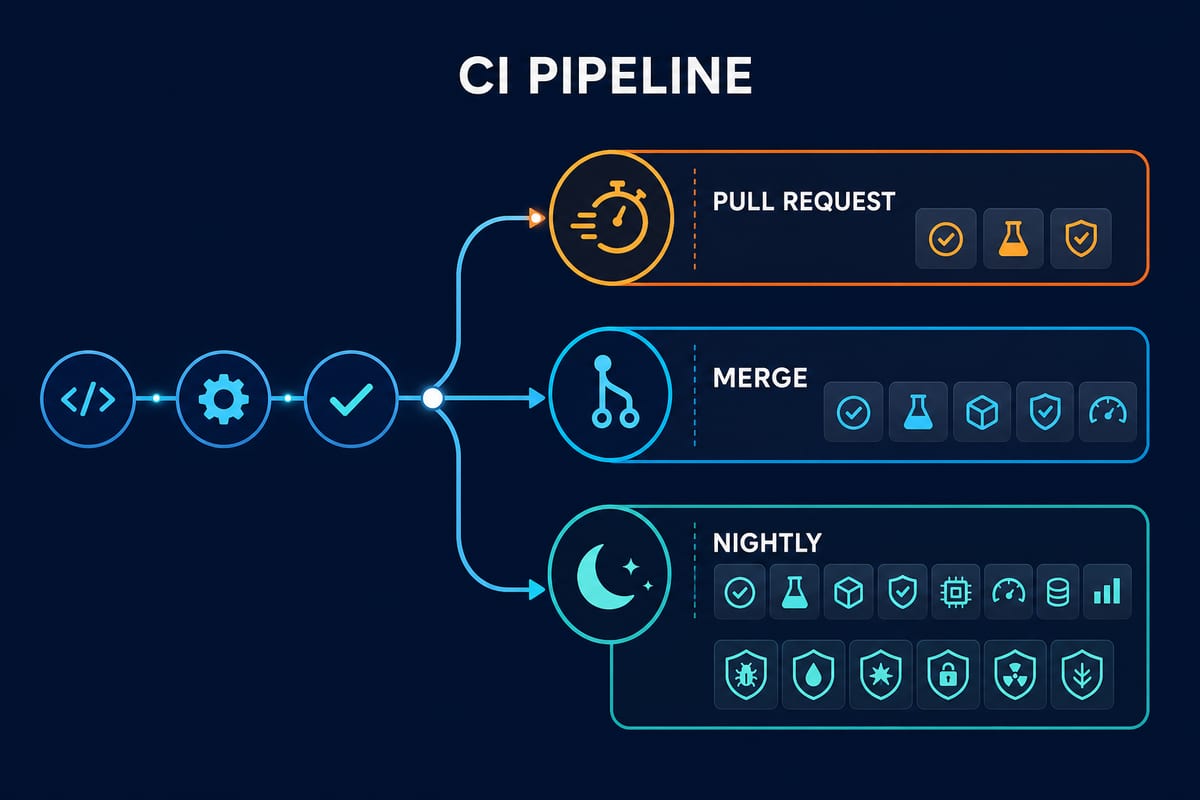
Keep the same Scheme and change only the plan name to divide the execution scope of CI jobs. For example:
- For each PR (Pull Request):
-testPlan Smoke— focused on core unit tests - Main-branch merge:
-testPlan Regression— all unit and UI tests - Overnight schedule:
-testPlan Nightly— including sanitizers and multilingual configurations
You can split the work further by configuration.
Like Apple’s current command-line example, --only-test-configuration runs only the specified configurations. Conversely, --skip-test-configuration runs everything except the specified configurations. Both options use two hyphens.
For a plan with five language configurations, the CI system can create five jobs and assign one configuration to each. However, this parallel distribution is handled by the CI system; Test Plans do not automatically split machines or reduce execution time.
xcodebuild test \
  -scheme MyApp \
  -testPlan Localization \
  --only-test-configuration Korean \
  -destination 'platform=iOS Simulator,name=iPhone 16'
Frequently asked questions
Q. Should Test Plan files be committed to Git?
A. Commit them if the team needs to share the same execution conditions. Uploading them to Git is not required by Xcode itself. Manage the plan together with the shared Scheme that references it.
However, because it is JSON, simultaneous edits by multiple people can cause conflicts. Splitting files by plan purpose reduces their frequency.
Q. Won’t multiple configurations make execution take proportionally longer?
A. Correct. Tests run repeatedly, once for each configuration.
So move heavy configurations, such as multilingual and sanitizer configurations, out of the regular plan and run them in an overnight plan.
Q. Can I put unit tests and UI tests in one plan?
A. Yes. However, unit tests run in seconds while UI tests take minutes, so feedback speed differs significantly.
Separating fast and slow plans fits the development workflow better.
Q. Do tests written with Swift Testing belong in a plan?
A. Yes. If XCTest and Swift Testing tests are in the selected targets, they can run in the same plan. Knowing Swift Testing tags and parallel execution as well makes it easier to split plans.
Q. What if I want to exclude only certain tests?
A. In the Tests tab, uncheck targets, suites, functions, or individual parameterized cases. In Xcode 16 and later, you can also select the scope with Swift Testing’s Include Tags and Exclude Tags.
Because this is recorded only in the plan file without touching code, other plans still run them.
A Test Plan is not a tool for writing new tests. It determines which existing tests to run and under what conditions.
If you have been splitting execution conditions by duplicating Schemes, save the default plan and organize plans by purpose. In CI, specifying plans and configurations per job clarifies scope, but actual time savings depend on runner count and parallelization.
Start by saving the default plan with Product > Scheme > Edit Test Plan and creating just one Smoke plan. Adding configurations afterward is much easier.
Sources and verification criteria
- Improving code assessment by organizing tests into test plans (Apple) — verified the current Xcode plan-creation menu, test-selection units, execution by configuration, and
xcodebuildoptions. - Testing in Xcode, WWDC19 (Apple) — verified the Xcode 11 introduction,
.xctestplanfile structure, and existing-Scheme conversion flow. - Xcode 13 Release Notes (Apple) — verified repetition modes, positive-integer repetition counts, and command-line option precedence.
- Go further with Swift Testing, WWDC24 (Apple) — verified Swift Testing’s default parallel execution and randomized execution order.
- Diagnosing memory, thread, and crash issues early (Apple) — verified sanitizer roles and Address Sanitizer execution costs.
The verification date is August 16, 2026. Menu names and command-line notation follow the current Apple documentation above; repetition defaults and CI time savings not confirmed in the documentation are not asserted.