
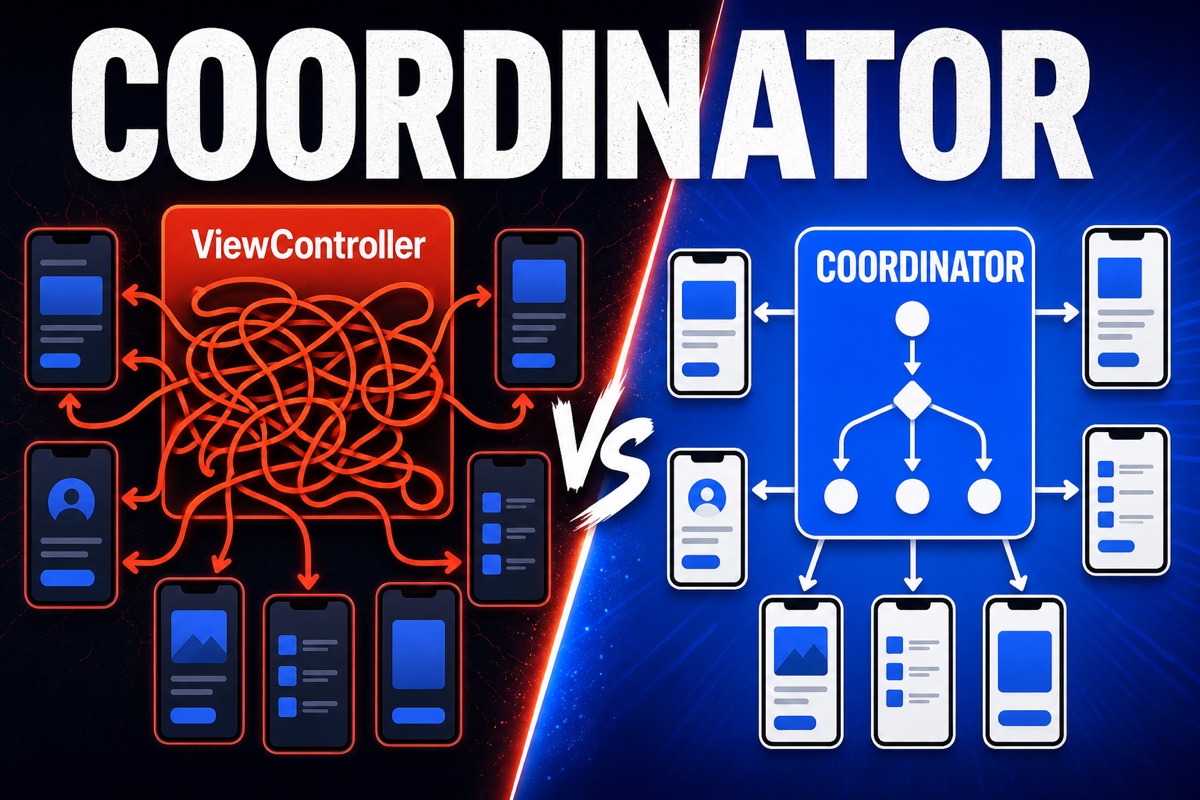
When building an iOS app, view controllers can gradually become bloated.
Rendering UI, processing data, and even pushViewController the next screen all get mixed together.
Left unchecked, complex flows make it hard to trace where each transition starts and ends.
Today, let’s look at the iOS Coordinator pattern, which cleanly extracts screen-transition logic from view controllers.
In short, the Coordinator pattern introduces a separate object responsible for screen transitions. View controllers render the UI, while Coordinators decide where to go next.
What Is the Coordinator Pattern?
Here is the one-line definition.
A Coordinator is an object dedicated to managing navigation flow.
Traditionally, a view controller rendered the UI, handled input, and navigated to the next screen on its own.
You simply extract the transition to the next screen and delegate it to a Coordinator.
When a button is tapped, the view controller only needs to tell the Coordinator that it happened.
It does not need to know where or how the transition occurs.
This removes the need for view controllers to know about one another. Screen A can remain unaware of Screen B, making reuse much easier.
Why Extract Screen Transitions?
Keeping transition code inside view controllers creates several problems.
Here are the issues I have encountered firsthand.
- Tangled dependencies: Screen A creates Screen B directly, so changes to B require changes to A.
- Poor reusability: Reusing the same screen in another flow means modifying its transition code again.
- Hard to understand the flow: Navigation logic is scattered across 20 files, hiding the overall picture.
- Hard to test: Transition logic is tied to view controllers, making isolated tests difficult.
Centralizing transition logic solves much of this.
The app’s screen flow becomes visible from a single Coordinator file.
How Do You Create a Coordinator?
The basic structure is simpler than you might expect.
First, define a protocol as the shared contract. start() serves as the entry point.
protocol Coordinator: AnyObject {
    var navigationController: UINavigationController { get }
    func start()
}
Then create the concrete Coordinator. It creates and presents the initial screen.
final class MainCoordinator: Coordinator {
    let navigationController: UINavigationController
    init(nav: UINavigationController) { self.navigationController = nav }

    func start() {
        let vc = HomeViewController()
        vc.coordinator = self          // A channel for receiving transition requests
        navigationController.pushViewController(vc, animated: false)
    }

    func showDetail() {                // All transitions to the next screen happen here
        let vc = DetailViewController()
        navigationController.pushViewController(vc, animated: true)
    }
}
When a button is tapped, the view controller only needs to call coordinator?.showDetail().
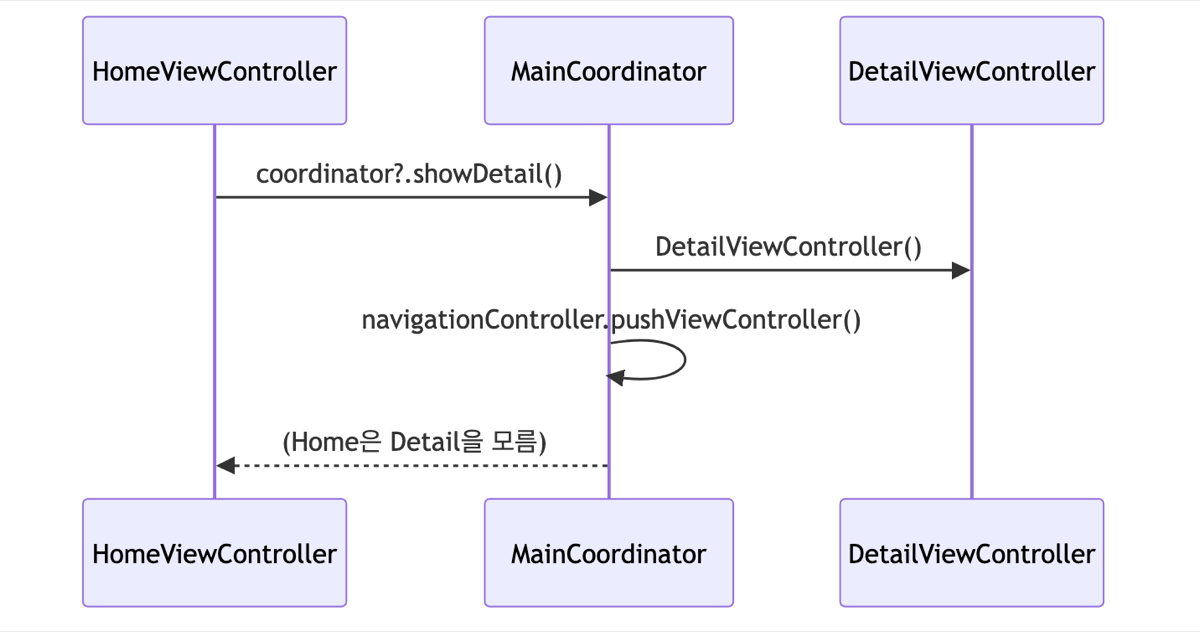
You no longer need to care which screen appears or how it is pushed.

How Does It Differ from Direct Pushes and Segues?
This is a common source of confusion, so here is a comparison.
| Item | Direct push / Segue | Coordinator pattern |
|---|---|---|
| Transition logic location | Inside the view controller | Centralized in the Coordinator |
| Dependencies between screens | They know each other directly | They do not need to know each other |
| Screen reuse | Difficult | Easy |
| Understanding the flow | Scattered across multiple files | Managed in one place |
| Initial effort | Low | Somewhat higher |
As you can see, Coordinators are not a silver bullet.
For a small app with only two or three screens, they may add more code than value.
But for apps with branching flows—login, onboarding, or tab switching—they clearly pay off.

Frequently Asked Questions
Q. Should I create multiple Coordinators when there are multiple screens?
Yes. They are usually split by flow, such as login and main flows. A parent Coordinator commonly manages child Coordinators.
Q. When should a child Coordinator be cleaned up?
When the flow ends, the parent should remove the child reference from its array. Otherwise, it remains in memory and causes a leak.
Q. Is it also used with SwiftUI?
SwiftUI has routing based on NavigationStack and path, so the approach differs slightly. The idea of extracting flow into a separate object still applies.
At first, adding another file may feel cumbersome.
Once your app grows to ten or twenty screens, you will appreciate this structure.
Try extracting one small flow into a Coordinator. You will feel the view controller become lighter. 🙂
Related Reading
- [Swift Basics #1] What Swift Optionals Really Are: They’re Enums (Including Five Practical Unwrapping Techniques)
- [Swift Basics #2] Swift Closures Explained: Why Capture, [weak self], and @escaping Belong Together
- [Swift Philosophy #1] Why Is Swift So Strict? A Complete Look at Its Three Principles: Safe, Fast, and Expressive